| Home | Food |
French-style Bread
I've worked a long time to create a reasonable French-style loaf of bread, one that has a browned, crackly textured crust and a light interior (it's not that easy). These steps capture my most successful attempts to date.
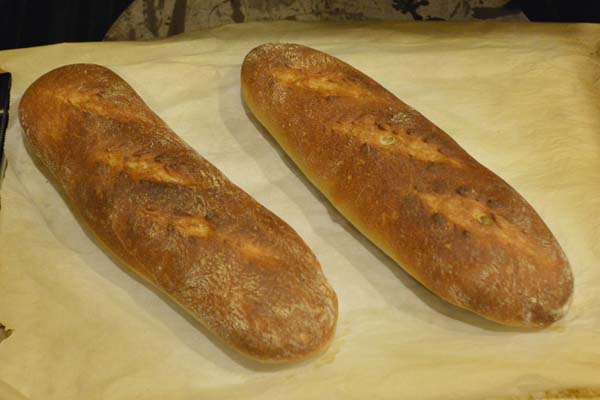 |
| Photo 1: French-style bread just out of the oven. |
Ingredients (makes four elongate loaves)
- 2.5 cups water (room temperature is okay)
- 1 package active dry yeast (make sure it is fresh)
- 2 teaspoons salt
- About 5 cups unbleached all-purpose and bread flour (more or less equal parts)
Helpful items and kitchen tools
- Plastic, closeable dough bin for mixing ingredients and letting dough rise the first time while staying moist
- Parchment (to keep the dough from sticking to the pan during final rise and baking)
- Large plastic, sealable bags (large enough to contain a loaf on a baking pan during the final rise; it keeps the dough moist)
- Food-grade plastic spray bottle to add water spray to the oven early in the baking stage
Steps
- Completely dissolve yeast in water in a large bowl or dough bin. There is no need to use water warmer than room temperature unless you are in a hurry.
- Add salt to water and yeast.
- Add the flour a cup at a time and stir into the mixture after each addition. I use about equal parts bread and all-purpose flour added alternately to the dough. As the dough begins to become sticky, add smaller amounts of flower and fold the dough into itself in the bin with a spatula rather than stirring it.
- Continue gradually adding flour and mixing until dough is formed but still sticky. THERE IS NO SET AMOUNT OF FLOUR TO USE!
- Turn the somewhat sticky dough out of the mixing container and onto a lightly floured kneading surface.
- Add a little flour as needed and knead the dough vigorously for at least five or ten minutes until the dough builds cohesion and loses most of its stickiness. The amount of flour required will vary depending on the amount of water used, the humidity, and the dryness of the flour.
- Place the kneaded dough in a covered container and let it rise until it is about doubled, which usually takes at least a couple of hours at normal room temperature.
- When the dough has approximately doubled in volume, turn out the dough onto a lightly floured kneading surface and gently knead the dough a few times to reduce the volume.
- Put the once-risen and lightly kneaded dough back into the plastic bin and let it rise a second time until doubled in volume, which shouldn't take as long as it did the first time.
- At the end of the second rise, turn out the dough onto a lightly floured surface and gently press it into a disk-shaped mass. Cut the dough into four wedges (or as many loaves as desired). Gently form each wedge into an elongate, rounded mass of dough by lifting and pressing the edges into the central axis of each dough wedge until there is some tension on the bottom surface of the dough (which will end up being the top of the loaf) and the dough is the approximate shape desired for the loaf.
- Place the formed loaves (with the tensioned bottom side up) on a parchment-covered baking pan and put the pan inside a large plastic bag for the final rise (do not let the bag sag onto the dough during the final rise).
- While the final rise takes place, preheat the oven to 500 degrees F, half-fill a large iron skillet with water, and heat the water on the stove until it approaches boiling and is generating ample steam.
- When the dough has risen moderately (usually about an hour; see Photo 2), carefully remove a pan with a risen loaf from the enclosing bag and make two or three shallow slices lengthwise in the top surface of the dough using a razor blade. Place the iron skillet with the steaming water on the lower shelf of the hot oven just before the dough is moved to the oven for baking.
- Place the baking pan (with the parchment and risen loaf) on an oven shelf in the middle-upper part of the oven. While the oven is open, quickly spray water into the upper part of the oven and close the oven. Repeat the water spraying at one-minute intervals for the first three or four minutes of baking.
- After baking for about 10 minutes, open the oven and remove the iron skillet and steaming water.
- After baking for about 15 minutes, rotate the baking pan so the bread bakes evenly. Reduce the oven temperature to 400 or so to ensure the bread doesn't become overly browned.
- Remove the bread from the oven after about 25 minutes total baking time. The loaf should be well browned (see Photo 1) and the internal temperature should be around 205 degrees F. Cool the bread completely on a wire rack.
- Repeat the baking process until all loaves are baked. After complete cooling, any additional loaves can be sealed in plastic bags and frozen.
 |
| Photo 2: Risen loaves after razor cuts and just before baking. |